Sunday, June 30, 2013

Let Your Dreams Take Flight........

The card I will show you today is for the CASology Week # 50 Challenge, Cue Card: Free. 

I used the stamp set, Dreams Take Flight, from Gina K Designs.


Using the negative portion of card stock cut with the Spellbinders Label Eight Die, I took the Adirondack Paint Dabbers in, Purple Twilight, Pool, and Lettuce and sponged random splotches all over til I was happy with the results.  Stamping the dragonfly in Memento Tuxedo Black Ink on top of the paint.  I added a bit of sparkle to the dragonfly outline and swirls with a Sakura Clear pen.  White adhesive pearls were colored with Copic New Leaf, YG23.
 
I always buy this package of plain white adhesive pearls, when on sale at Michael's, or with a coupon.  The regular price is $6.99 and there are 480 assorted sizes.  You may think those small ones are too small, but they work really well on any design.  I find they are a good quality and you can change the color so easily, here using a Copic marker.  I am sure any marker would work, just let it dry enough before placing on your project.


With my work weeks as busy as they are this summer, I hope to get enough posts in place when I have the time.  Sooooo, I hope to see you back here soon.
 
Thanks so much for stopping by, enjoy your day and happy crafting!
 

Saturday, June 22, 2013

The ABC's Of Crafting.....Or Anything But A Card

Another wonderful and creative challenge over at STV, my home away form home.  Laurie Schmidlin challenges us to make an ABC Project.....Anything But A Card.   You can check out the details HERE.

For my entry I decided to make some Beachy Magnets using simple crafting materials.  Here is what you'll need:


Rubber Stamps, Glossy Accents, Memento Tuxedo Black Ink, Copic \Markers (or other markers of your choice) half glass marbles, (found in the floral section of your local craft store) I am using the larger ones for these magnets, heavy duty card stock, and magnets.

Trace the half glass marbles shape onto your card stock*.  Cut out cutting on the inside of the line, as you want the card stock to be a bit smaller than the back of the marble (I usually trim mine after gluing as well).  Using the Memento ink, stamp the image and color using whichever markers you choose.  I also added a bit of sparkle with a Sakura Glitter Pen.

*keep in mind that you want the traced card stock to go with that particular marble as they are all odd shapes.


Next grab some Mod Podge......I think it's safe to say we all have this in our stash of supplies, right?
 
 
Using a foam paint brush coat the image side of your cut out card stock and adhere to the matching half glass marble.  Remember the marbles are all different shapes and you want to keep track of what image goes with which marble.  At this point I add a bit of Glossy Accents to the edge of the card stock to seal it to the marble.  It doesn't look pretty, but it works!
 
 
 Technically you can slap a magnet on the back of these and call it a day.  I find it nicer to add them to some card stock for packaging.  Take some plain old washers, my Hubby gave me a box of them, and glue them on to a piece of card stock.  I used this awesome glue, Quick-Dry Adhesive, by Scotch.
 
I also use this glue to add the magnets to the back of the marble.


Then place the magnet onto the washer and check out your pretty new magnets.


The stamps used for this project are from Gina K Designs; Gift From The Sea, and that little green swirl is from A Little Something.

I made these smaller magnets using the same technique.  They were the gifts I made for the Pay It Forward 2013 Project I participated in.  I think they came out beautifully and the recipients seemed to be delighted.


Give these a try.  They are fun and easy to make in just a little bit of time.

Enjoy the rest of your weekend!  It's back to the gardens for me.....love it!

Sunday, June 16, 2013

Mother Nature And All Things Pretty

I LOVE this time of year.  The sun is stronger, the days are longer and the gardens are bursting to life.  What more could you ask for?  I am an avid gardener.  I love to play in the dirt, and sometimes it actually pays off.  I can out wait Mother Nature too.....sometimes she is a tricky lady.  I bought some peonies 3 years ago, all in bloom.  Planted them in a perfect sunny spot, and for 3 years I never saw them bloom again.  I waited......I fed them.....I pleaded and begged them......insert the sounds of crickets chirping......and then this Spring I began to see signs of buds.....I checked on them daily and sure enough Mother Nature was pulling through!  They are in bloom, glorious delightful bloom!  I am a patient gardener......I am a happy gardener.   


Peonies

I plant a lot of flowers from seed, collecting them each fall, just hoping and praying that one day these too shall grow tall and strong and bloom.  This year, the third year, again, my Baptisia is well in bloom, with more healthy plants popping up all over.  3 years in the making.   I truly believe in the adage:  Sleep....Creep....Leap!  Be patient....it will payoff!


Baptisia
 
A few of my other favorites in bloom!
 
Foxglove
 
Painted Daisy
 
Wall of Cranesbill & Snow In Summer
 
I love the wild and crazy look of my Snow In Summer......the only snow I enjoy after March, by the way!  lol

Red Rose
 
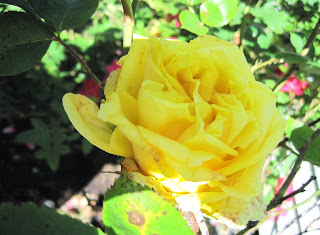
Yellow Rose (so fragrant!)
 
 
And for your patience here are a couple of cards I made last night.  They are quite simple, colored with Copic Markers and Sakura Glitter Pens.  I finally bought both stamps a week or so ago (on sale!).  I have always coveted them, and now I own them.  JOY!  :)
 
I LOVE, LOVE, LOVE the look of this row of bottles.  I feel as though they should be sitting on a windowsill in a cottage by the sea!  I added some eyelets to the 4 corners and some Seam Binding Ribbon.  Gives it a shabby chic feel to it.  The yellow flowers have Liquid Pearl centers and the small squat bottle has a clear Sakura pen colored over it.  I also used some more Sakura pens to highlight the pink flowers and that 'brass' bottle top.
 
 
Inkadinkado # 60-00513 Bottle Row
 
 
This next card just makes me think Spring!  I have several birdhouses throughout my yard, mainly for ornamental reasons.....BUT the birds don't know that!  Right now I do have a little nest in one and if i can get closer, the Mama is a real squawker, I will see how many eggs/babies there are.
 
This card also has Liquid Pearls, Sakura Pens, some paper piercing and Baker's Twine, my favorite is from The Twinery, they have the prettiest colors and the best quality!  And a little more Seam Binding Ribbon.
 
Inkadinkado # 97148 New Nest With Flowers
 
 
Want to know a simple little trick when using Seam Binding Ribbon?   I bought a large roll, 100 yards of Hug Snug, Chalk White, Seam Binding Ribbon from  Zipper Stop.  Quite inexpensive and fast shipping.   I purchased the Chalk White as you can do anything to this product to change it's color.  You can swipe ink pads over it, ink daubers, Glimmer Mist, color it with Copic or other markers, etc.  What did I use for the 2 cards above?  Any guesses?  I used plain old everyday food coloring.  Just added a bit of blue and red to separate containers, a splash of water and dunked the ribbon right in, swished it around for a few seconds and then dried it with my heat gun.  The longer you dry it the more, curlier it becomes.  You probably have seen beautifully designed cards with long flowing trails of seam binding ribbon, right?  They are gorgeous!  I just wanted to add a simple little touch of soft color to my cards and I think this worked perfectly!  Try it, you'll be happy you did!  VERY inexpensive!
 
 
Thanks for stopping by and walking through my yard......next time come at the Cocktail Hour!
 
Enjoy this gorgeous Father's Day!
 
*****  oh and if any of you would like to do a *seed swap*, this fall I should have, Columbine, Purple Cone Flower, Shasta Daisy, Foxglove, Marigold......to name a few.  :) *****


Days Of Diva Tags

There's a great Tag Challenge going on over at Stamp TV  Every Monday a new Challenge goes up and for as long as I have been a part of the STV Community I think I have only missed one.  And doesn't that just make me crazy to have missed THAT one?!?!  lol

I decided to use some of my Diva stamp sets.  These are great little sets starring a stunning Diva in different settings.  Well here, I'll just show you!


Serenity Diva


Balanced Diva


Green Thumb Diva


Scooter Diva


Rainy Day Diva

I cut out all the tags using my Cameo, such a handy little device.  Can't imagine the things I will be able to do with it once I sit down and give it the proper time to play with it.  All of the Stamp Sets can be found here at Gina K Designs
 
Nothing too fancy on each tag, just added ribbon and adhesive pearls.  I used Memento Tuxedo Black Ina and colored everything with Copic Markers.  I probably will add a skewer to the Green Thumb Diva Tag and stick it in a plant and give to a friend.
 
That's it for now.  Until the next time........


Saturday, June 15, 2013

A Happy New Home

Good Morning!  2 days in a row, whahoo!  I made the following card for the SSSC#186 Sketch Challenge.  Every other Sunday there is a new and wonderful Sketch all laid out for you.  If your MoJo is a little sluggish this is a great way to get it flowing again.  Just add some pretty Designer Paper, beautiful stamped and colored images and wha la! 

This card is made for a beautiful young woman, a very dear and close friend of my daughter and our whole family.  Molly calls me her OM....... 'Other Mother' and she lives in my heart as my OD......'Other Daughter'.   She has shared many an adventure with our family and more specifically our daughter, Lori.  From soccer teams, playing and coaching and summers spent on Cape Cod.  Molly and her boyfriend, Greg, just bought their very first home and we are all so excited and happy for them. 


The card uses some Gina K Designs Products:  Pure Luxury Card Stock;  Jelly Bean Green, White.  Home Is Stamp Set.
 
American Crafts Pink Card Stock, Echo Park Designer Paper, Country Drive, Spellbinders Standard Circles Large Die, Green, Yellow, Pink Copic Markers, Ribbon, White Pearls--colored with Copic markers.  Mini Heart Paper Punch.
 
 
Thanks for popping in.
 
 
Have a wonderful weekend!

Friday, June 14, 2013

Summer Schedules......

Good Morning!  Wow it certainly has been a very long time since I checked in.  My work schedule picks up so much in the summer, I hardly have time to craft, let alone time to chat about crafting.  But, the day after Labor Day is right around the corner.......right???  lol

This Clean And Simple card was made for the CASology Week #48 Yellow Challenge.  I enjoy participating in these Challenges as CAS cards are quite difficult for me to make.  Sometimes I begin making a card and only realize too late that it already has 17 layers and will not qualify as a CAS card.  So, this site is VERY helpful to me.   Be sure to check out their Challenges, especially if you are interested in trying to master this style of card.  Good Luck!


This card uses Gina K Designs Products;  Pure Luxury Card Stock, Sweet Corn and White.  Stamp Sets;  A Year Of Flowers 2, sentiment from Fairy Tales.

Inks;  Memento Tuxedo Black, Stampin' Up! More Mustard.  Sakura Glitter Pen and Pop Dots.

Thanks for being patient and checking back in with me.  I have a few days off so I am hoping to post a few more cards this weekend.

Enjoy your day, and thanks for stopping by!